
Mayurasana or the Peacock yoga pose is one of the
main asanas mentioned in the yogic text Hatha
Yoga Pradeepika. In sanskrit, ‘Mayura’ means peacock and ‘asana’ means
pose. Mayurasana or the peacock pose
is a difficult asana for beginners. Yet with a little practice over few weeks,
one can master this asana. All one needs is patience and perseverance.
However
this asana should be avoided if you have medical conditions like hernia, high blood
pressure, heart problems and ulcer. Also women should avoid it during
menstruation and pregnancy. Always attempt his asana on an empty stomach.
The first part of the article will
give step by step instructions to perform this asana. As mentioned earlier, Mayurasana is a difficult pose.
In case you are not able to attempt this asana, the second part will deal with
practices which will help you gain the necessary strength and balance (in a
matter of days or weeks) to perform it.
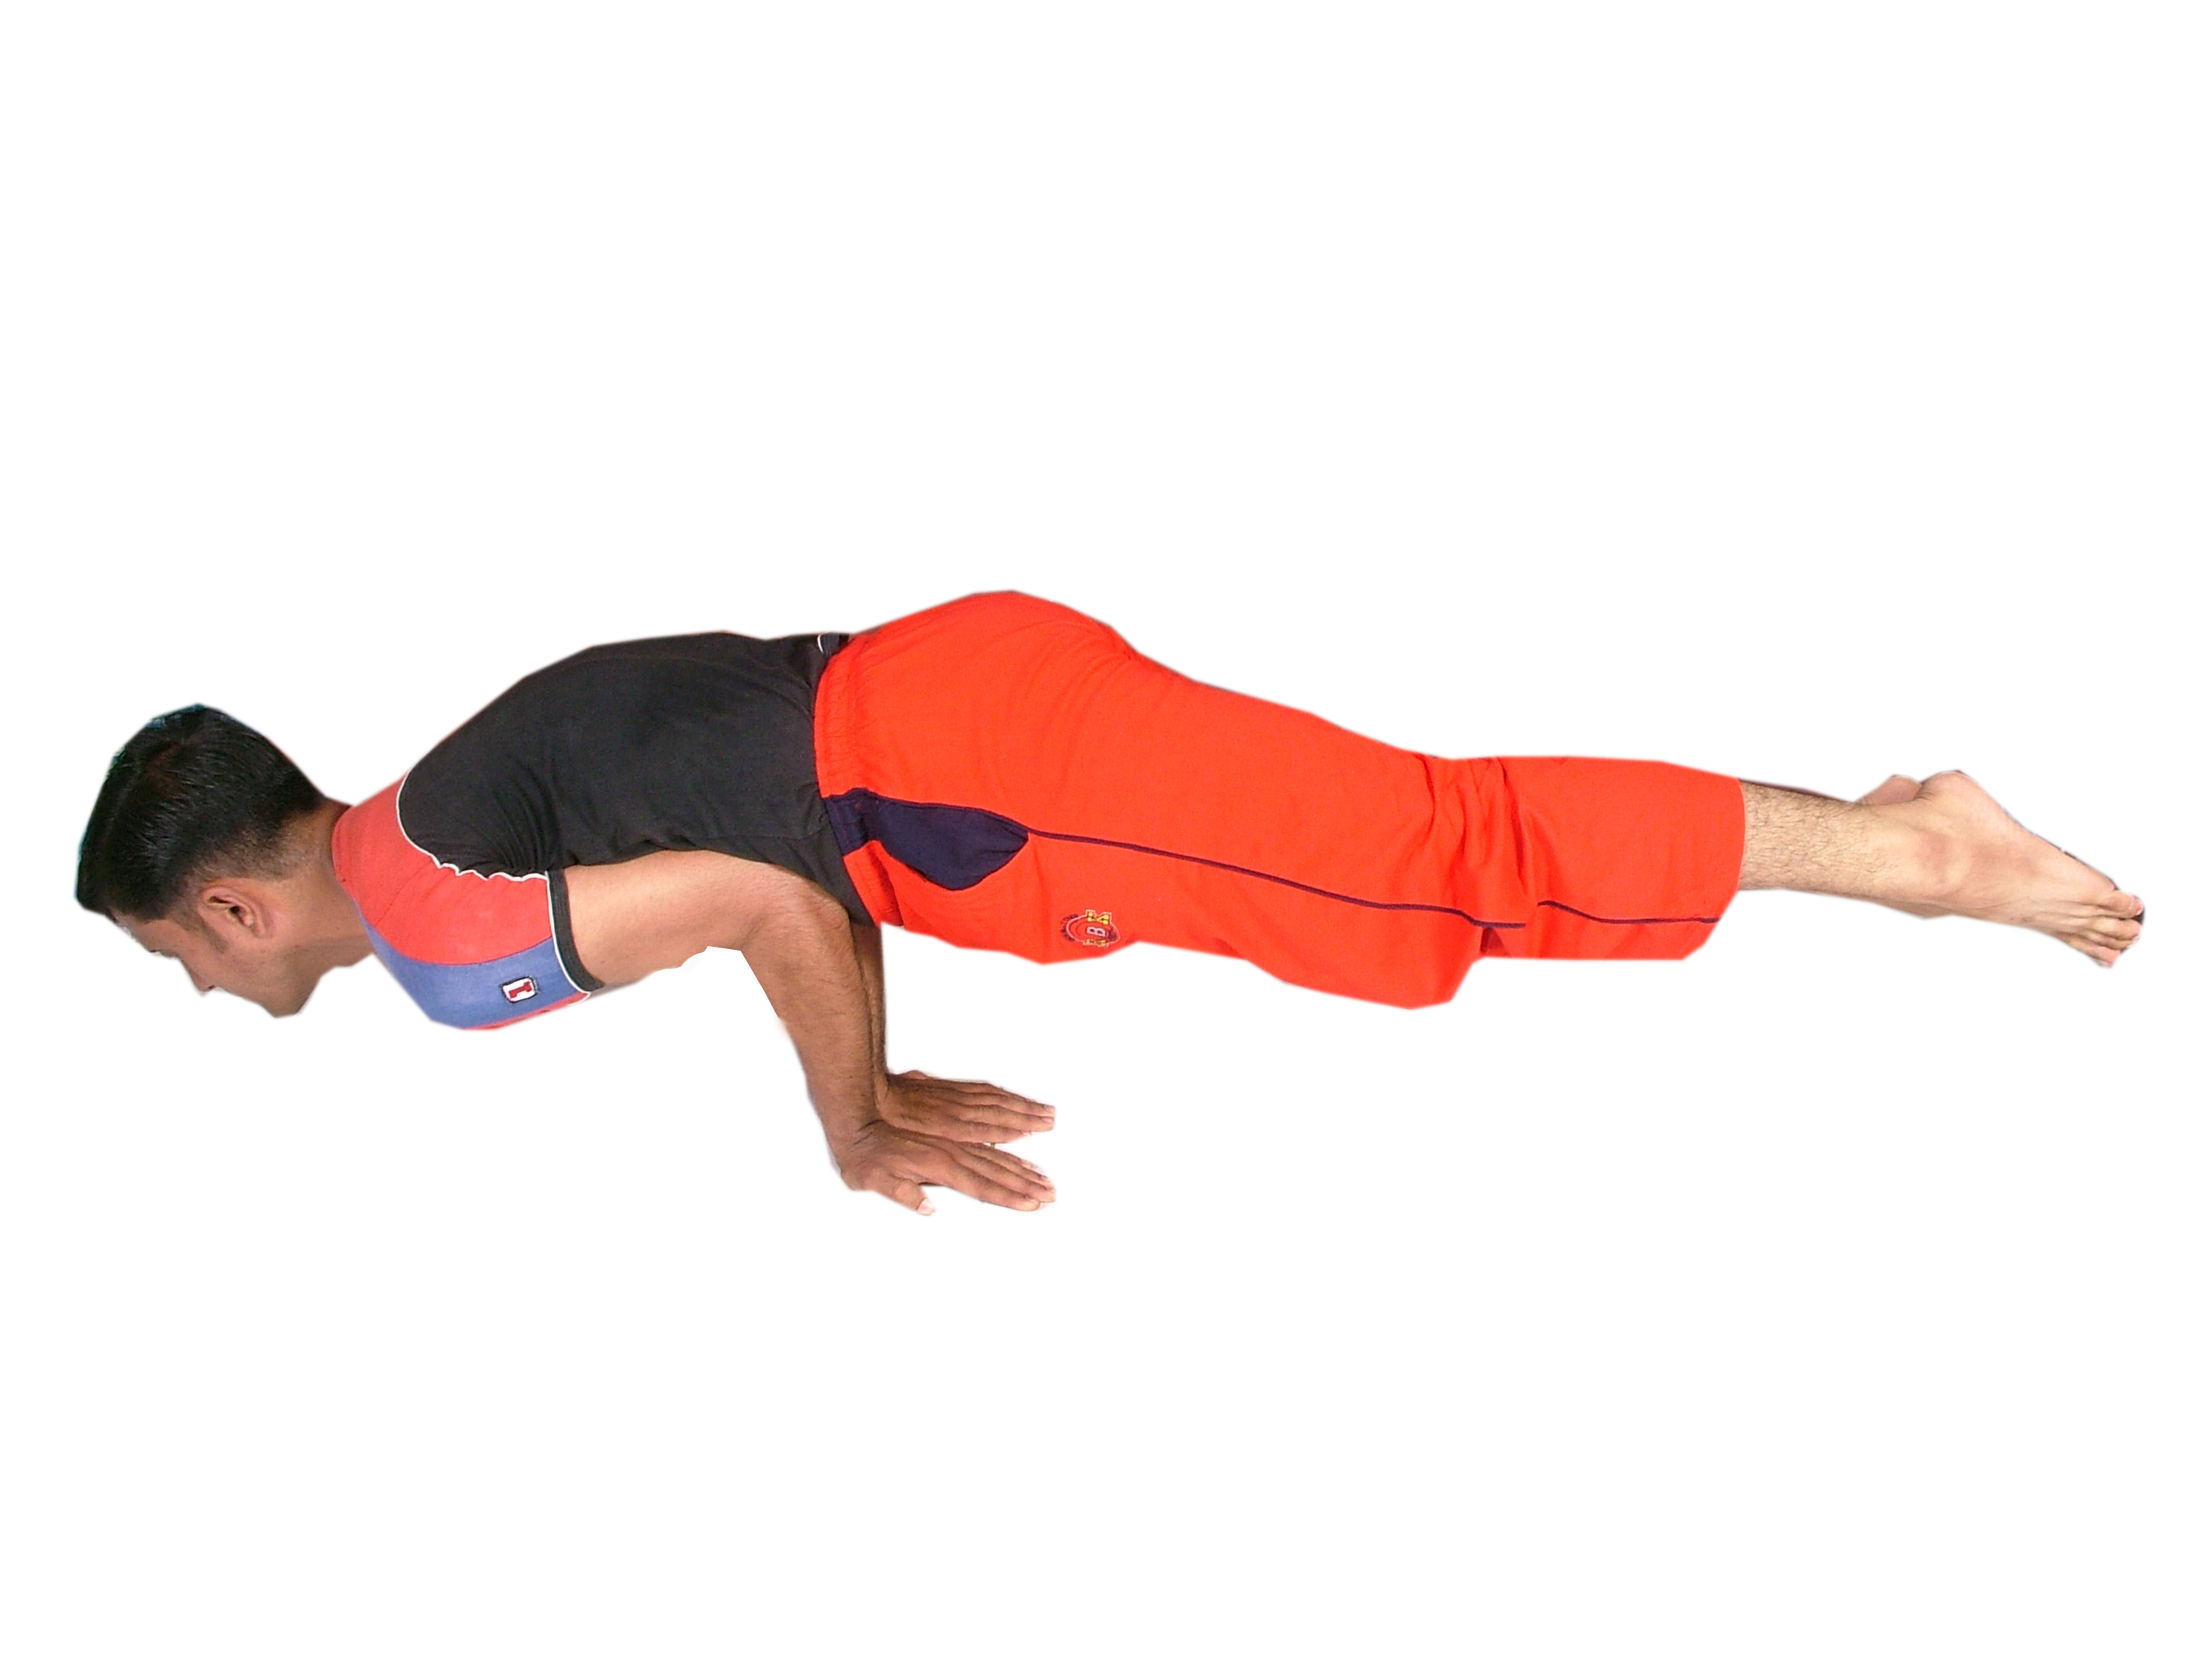
1. Kneel
on the floor, knees wide, and sit on your heels.
2. Lean forward and press your
palms on the floor with your fingers turned backwards. The palms should be
placed between the two thighs. The elbows should rest on the abdomen.
3. Slowly move the legs back, one
after the other so that they are straight and the toes touch the floor.
4. Raise the whole body by tensing
the abdominal muscles and resting the weight entirely on the palms. Try to make
the body horizontal and parallel to the ground. The body is balanced by the
elbows on the abdominal muscles. The weight is entirely borne by the forearm
and palms.
5. Try to maintain this pose for 5
seconds in the beginning. Slowly, it can be increased to 1 minute or more.
Mastering Mayurasna for
beginners
If you can perform Mayurasana on the first attempt,
then you must be fairly healthy and strong. Most practitioners need few days to
few weeks to reach this stage.
An easy way to achieve it is by
practicing Hamsasana, a pose which is
similar and easier to perform. Hamsasana or the “Swan Pose” is
a related asana where you do only the first 3 steps mentioned above. It is same
as Mayurasanaexcept that you don’t
have to raise your legs above the ground. Instead the toes can rest on the
floor and give additional balance to the body.
Stage 1:
Start with 5 seconds of practice of Hamsasana and then reach up to
1 minute. This may take few days to few weeks depending on your health,
flexibility and strength.
Stage 2:
Perform Hamsasana as mentioned in stage
1.
Now
raise just one leg above the ground so that it is parallel to the ground. The
other leg rests on the floor, balancing on the toes. Maintain this for as much
time as you can. Start with 10 seconds and go up to 1 minute. You can alternate
between the legs. First practice with the right leg raised above the ground and
then with the left leg raised. Continue practicing this till you are
comfortable to maintain the pose for at least 1 minute.
Stage 3:
Now you are ready to attempt Mayurasana. All you have to do
is to raise both the legs above the ground. Note that this will require you to
re-adjust the position of your elbows on the abdominal muscles.
With
little trial and error, you will figure out the right position for the elbows,
so that entire weight can rest on the palms. Try this for just few seconds in
your first attempt. Slowly increase the time to 1 minute or more over period of
time.
Benefits of Mayurasana (The
Peacock Pose)
1. Mayurasana tones the entire digestive system and revitalizes the
internal organs including stomach, liver, intestines, kidneys, pancreas and
spleen.
2. Mayurasana makes the digestive fire so strong, that one can
digest any type of food, reducing the production of toxins in the intestines
due to undigested food.
3. It is an effective detox pose.
4. It increases sexual vitality
and energy.
5. It strengthens the arms and
shoulder muscles. It also helps alleviate conditions related to constipation,
piles and diabetes.
Mayurasana is your gateway for perfect health.